Mikhael's Portable Atari 2600

Monday, November 07, 2005

It's Alive!!!

WOW!
Yesterday I finally finished hooking everything up, I put in batteries, turned on the power switch, and... NOTHING. DEAD. NADA. It was almost midnight (I was so close I had to stay up late to finish it) so I didn't have time to troubleshoot it, but I went to bed thinking about how the whole thing might have been fried or something, and that it was going to be too complex to figure out what went wrong.

Tonight, I wound up ungluing the LCD screen from the case and took the whole thing back out (very difficult considering the mess of wires) to get full access to all the terminals where the wires were connected. I tested the pin on the LCD that was supposed to have 5 volts, and saw it had barely any power at all. So I knew there was a power issue. The voltage regulator (which had more to do with powering the Atari than the LCD screen) was giving out 5 volts as designed, and it was getting a full 7.2 volts, so that wasn't the problem. I then figured out that the A/V jack that I broke when I first took it off (as I mentioned in my October 23 posting -- should have known that would come back to haunt me) was the problem -- power was going in, but not coming back out! Since I am never going to hook this portable up to an external TV (I have a full size Atari for that), I just bypassed the jack and hooked the incoming and outgoing wires together, so I knew power was going to go to the LCD screen. I hit the power switch one more time, and... success! The LCD screen looked really bright and "overblown" but after I messed with the color tint potentiometer, I saw that it was easily adjustable. I need to compare it with a "known" game to get the color right, etc. but for now, I know it works!! Here is a photo of Atari basketball. Now I just need to put the screen back in the case and screw the thing together.

One other issue I discovered is that my speaker isn't hooked up to anything! So I need to figure out where to connect it. Also, I found that I wasn't able to plug the headphones into the headphone jack, since the case wall is too thick and is keeping the headphone plug from inserting all the way. But hey, no big deal considering the thing works! These are minor details I will work out.

Sunday, November 06, 2005

About Finished Wiring it Up

Well, I am about done with the initial wiring. Here is a photo of the progress. Should be done tonight.

Getting Close!

Wow, I think I see the light at the end of the tunnel...
I got a lot done on the project today -- let's see if I can remember everything:
I glued the back of the case together, modified (cut and soldered) and installed the battery holder, drilled the screw holes for the back of the case, installed and glued the TV into the front of the case, glued the brightness and volume knobs into their spaces in the front, glued the headphone and A/V jacks into the front, checked and re-soldered some loose wires on the game controller board, and finally labeled all the loose wires that will have to get soldered to the Atari portion.


What I have left is to iron on the black trim on the back of the case, solder all the wires onto the Atari board, install the power regulator and hook up the power wires, then finally turn it on and troubleshoot!

I know it won't work right the first time, so I am not going to even think about putting the case together yet... if (when) it doesn't work, I'm not really sure how I am even going to start troubleshooting, since there are SO many parts to this project. I'm just going to pray it works the first time, otherwise I may be dead in the water for a while! Hopefully I will get some time tomorrow to do the soldering so I can start testing this thing out.

Friday, November 04, 2005

Started Back of Case

Today I cut out the rear portion of the case and the battery door, and bent the aluminum to fit. I'm going to glue it on tomorrow. The aluminum for the back isn't bent exactly like the front, but there is really no way to bend a 2mm thick piece of aluminum the exact same way by hand! I don't think it will be a big deal, either way.

I never was able to find the exact drill bits I wanted, so I went ahead and drilled the bigger holes. Doesn't seem like too big a deal, since they are only slightly bigger than I need. I glued back in the power switch, and also glued in the DC input jack (I used a 5-minute 2-part epoxy for both).

The next step will be to glue on the aluminum to the back, and glue the rear screw sleeves in place. I'm also going to have to figure out how thick of a "shim" I need to make for each screw sleeve to extend it, since the aluminum for both the front and back is slightly wider than the screw sleeves are long. In other words, when I screw the case together, only the aluminum will be touching since there will be a gap between the front and rear screw sleeves. A shim will close this gap and allow me to screw the case together tightly.

Thursday, November 03, 2005

Ironed on the Black Trim

Tonight I ironed on the black trim around the front half of the case (the instructions were in Italian for the trim, but I used an online translator to figure out what setting to put the iron on). I think it definitely looks better, though you can definitely see gaps in places where the edge of the aluminum trim stuck out from the edge of the PVC plastic.

I removed the power switch when I ironed on the trim, then cut the slot for the switch through the trim after it was stuck on. I also drilled holes for the headphone jack, audio/video out, and DC input jacks. Unfortunately, I don't have the exact size drill bits for these jacks (13/64" and 15/64"). My 3/16" bit (or 12/64" for the math impaired) is too small for the 13/64" jack, and the 7/32" bit (14/64") I have is both too big for the 13/64" and too small for the 15/64" jacks! So, tomorrow I am going to look for these size drill bits. If I can't find them, I guess I will have to drill holes that are a bit too large, and put a lot of glue to keep the jacks from wiggling. Definitely NOT what I want to do, but I may not have a choice.

Wednesday, November 02, 2005

Wired the Control Panel and Buttons


I worked some more on the Atari today when I got home. I decided to do some more soldering, so I worked on the control panel. Because I cut the holes too large for the buttons as I mentioned in my last post, I decided to make my own buttons out of the blue PVC plastic. I basically cut out two circles and glued them on top of each other to give them the right thickness. Took some trial and error, but I finally got them to work right.


As you can see, there are a ton of wires attached to the back of the PC control board I installed. These will all go to the Atari, in the places where the joystick ports were originally wired. It took a while to install the tact switches that are behind all the buttons and then solder all the wires, but I think everything will work fine.

Sunday, October 30, 2005

Completed Front of Case


I worked a lot today on the front of the case. The aluminum strip I bought was 2mm thick, which is a bit thicker than the 1/16" stuff they sell in the states. It was really difficult to bend, so I had some problems getting it to conform to the edge of the case front. You can see where it is sort of "dented" looking in the photo here, on the top right side near the power switch. I tried rebending it a number of times, but it started to "rip" the aluminum in the middle of the bend, so I had to stop and go with the way it was.

You can also see where I glued in the speaker, put in the power switch, inserted the potentiometer (and cut the shaft down to size) which will be used as the Atari paddle, and put in the nylon sleeves which will be used to hold the case together with screws. I found that one of the nylon sleeves was in the way of the power switch (I should have put the switch a little lower down the side), so I had to break the sleeve off in order to put the switch in. I guess I will see if that causes a problem down the road! I don't think that particular sleeve screwed into anything; I think it will act as a spacer, and hopefully the other three around the cartridge hole will suffice.

Here you can see the blue PVC I bought, which is acting as a frame around the hole for the screen. The whole thing is taking on a bit of a "Fred Flintstone" look because of the handcut appearance, but that adds to the character of it!


I've also realized that I drilled the holes for the fire buttons too large, so I will have to come up with a solution for that later...

Saturday, October 29, 2005

Gave up on Clear Case

Well, I unfortunately had to give up on the clear case. When I started to cut out the small inserts in the front of the case for the buttons, it was nearly impossible to cut, then wound up cracking since the plastic was so hard and brittle.

So... back to the hardware store for new material! I found some 3mm thick (about twice as thick as what I wanted to match the engraving plastic mentioned in the book) PVC sheeting that was in a variety of colors, so I bought a black sheet and a blue sheet. I also bought a roll of screening in order to have some in front of the speaker.

I cut out the new front, here is what it looks like:

Tuesday, October 25, 2005

Started to Make the Case

Since I did all the soldering this past weekend on the portable TV, I now have both the hacked Atari and TV... so it's time to make the case to put them in!

I went to a hardware store here in Naples called Leroy Merlin last night, and bought some clear hard plastic (2mm thick I think), a piece of 2mm thick aluminum, and some screws. I also got some epoxy and another set of exacto knives. I started tracing out the front panel last night, but I got pretty concerned that the plastic was going to be too brittle to work.

Tonight I worked on it some more, and got out a big utility knife to trace over the grooves I originally made with the sharp exacto knife. I then cut grooves in almost the exact same place on the other side of the plastic (easy to do when it's transparent!), and lo and behold, I was able to snap out the front panel!

Now for the even harder part, which is to somehow cut out the tiny holes inside the panel which will accommodate the fire buttons, start button, etc. That should be interesting... I think that I will try to score the outside of the holes as much as possible on both sides of the plastic, then use a drill to get in the middle of each cutout, and somehow pop out pieces of plastic until I get to the scored edge of each cutout. It will be a challenge, for sure! I already have some minor scratches on the plastic since it scratches easily, but that will just add character to the thing. It's going to be ugly anyway since the guts will be exposed, but that's part of the "coolness" of it in my opinion -- it will truly look like a "hacked" project with visible wires, electrical tape, circuit boards, etc. Even the battery cover will be transparent! I'm looking forward to seeing the finished product already...

Sunday, October 23, 2005

Marathon Soldering Session Last Night

Wow!
I stayed up until 3am last night, soldering for 7 straight hours... Well, soldering, desoldering, and hot gluing, I guess I should say. I was working on hacking the Casio EV-680 portable LCD TV, which is the most expensive part of the project.

I was pretty nervous, knowing that I only had one shot at getting it right. And I still don't know if I messed up, and won't know until I test out the final product! I had some trouble desoldering a few spots on the board, and my biggest mistake was trying to forcibly pull out the audio/video jack without it being fully desoldered... it wound up breaking into a few small pieces. OUCH. But, I super glued it back together, and I think it will suffice. I don't think I will ever be actually able to use the jack, but since I was never planning on it, it shouldn't matter. From what I can tell, the part that broke isn't that critical... but I guess we shall see!


The toughest part, by far, was bending down the 18 tiny pins on one board and soldering them to the tiny pins on the board below (you can see these pins just under the LCD screen in the photo above). It wasn't so bad until I accidentally got some solder in between two adjacent pins -- if you know anything about surface tension, you can imagine how difficult it was to get the melted solder out from between the two pins. I kept just touching the iron to the solder, then wiping it on my wet sponge until I got enough off that it broke the surface tension bond.


I tested out the continuity of my soldered wires using my multimeter, and the thing that makes me nervous is that I have some connections that are definitely connected to ground, and I'm not sure that they should be! The first three pins of the 18 pins I mentioned above are all effectively connected to each other and to ground, but since they aren't physically connected, I would have to assume they are connected to ground on the circuit board itself. I'm also worried about one of the two knobs I desoldered and reconnected using long wires -- there is one pin that is connected to ground on one knob, and the same pin on the other knob is not connected to ground. Hopefully they are supposed to be different! What makes me even more nervous is that the one connected to ground is one of the ones I couldn't properly desolder, and wound up breaking a pin off in (then eventually pulled it out). I'm hoping I didn't do some microscopic damage to the circuit board that now is making that pin connect to ground accidentally?? Who knows. Well, at least I'm having fun.

Sunday, October 16, 2005

Finally Got Started

I finally started hacking up my Atari today! I cut up the motherboard, then soldered a bunch of wires and parts onto it. I was having some trouble soldering the parts since I was working on the patio and a cold wind was blowing (which certainly cooled my soldering iron), but when I turned it up from 15W to 30W I had more luck. I just hope I didn't burn up any components while I was working on it! :)


My next step is going to be hacking up the pocket TV, I think. Since that was the most expensive part of the project, it's the part that makes me the most nervous. But, I think I can do it successfully! I'll just have to wait until I have a few hours to spare to work on it.

Friday, September 23, 2005

Parts have arrived!

Just when I said I was waiting for parts... a bunch came in today!
I got my shipment from both Radio Shack and Digikey. I'll take pictures in a few days to put on the site of all the parts.
Tonight I ordered a Nintendo controller (needed for the Atari buttons) on ebay for $7.75.
I also bought yet ANOTHER Atari system on ebay for $32.57; this one looked brand new and had 10 games in their original boxes: I'm hoping to sell it and make some money back on this project, after I check it out. Maybe I'll keep it and sell one of the others I bought?? Who knows, but I didn't think it was advertised on ebay well, and I've seen ones with original boxed games go for more money, so we'll see.

That's it for now.
Total amount blown to date is $317.10

Bought the Casio EV-680 portable TV today

Well, today was my last big purchase for the portable Atari. I got the Casio EV-680 on ebay for a total of $88.05 including shipping. Not too bad, compared to the typical amount these go for.


I'm still waiting for my shipment of electronic tools and parts from Radio Shack and Digi-key. Gotta love trying to build this from overseas! Shipping is so slow. I did get my shipment of two broken Atari consoles and the 39 games... and one of the consoles is working! I didn't try the other one much; it did seem to put out some video signal, but it definitely was scrambled looking. It will be interesting to see if I can fix it!
That's all for now.

Total amount spent on this project to date is $276.78

Wednesday, September 14, 2005

Bought Electronic Parts

Tonight I blew some more money. This time I bought the majority of the electronic parts (resistors, knobs, etc.) as well as tools to do the work. Most of the money I spent was on tools like a soldering iron, desoldering iron, and a stand to hold the circuit board (these three items alone totalled $33.97). I got all these from Radio Shack, as well as a bunch of other things. Total cost was $66.15. Radio Shack gives FREE SHIPPING TO FPO/APO ADDRESSES! How cool. Maybe I will actually start using them more often...

I also bought some parts from a place called Digi-Key that has a million electronic items in their catalog -- the problem is that it is impossible to know what you are buying if you are a novice like me, but luckily the book gave part numbers. :) I spent $25.27 with them, but they didn't include the shipping cost, which I estimate to be $3.85 for priority.

So at this point, total money blown is $188.73
I still need to buy a portable TV screen (about $90) and some plastic to make my case, so now it looks like this thing will soak me out of about $300. But, you also have to consider that I am gaining some electronic tools like the soldering irons, and the working Atari and games aren't exactly part of the project... I guess at the end I will have to sort out exactly how much went into this thing as far as parts are concerned, and then separate out the cost of the tools and the game cartridges.

Just for fun, I will try to cut and paste the material lists of the stuff I bought tonight. Then I'm going to bed!!

Well, I see that Radio Shack hasn't emailed me an itemized copy of my order, so I will have to post their list later, but here is Digikey's:

Index Quantity Part # Description Unit Price Extended PriceUSD
1 10 876K-ND SPACER ROUND #4 SCREW NYLON CLR 0 0.10400 $1.04
2 10 880K-ND SPACER ROUND #4 SCREW NYLON CLR 0 0.15800 $1.58
3 10 888K-ND SPACER ROUND #6 SCREW NYLON CLR 0 0.15800 $1.58
410 878K-ND SPACER ROUND #4 SCREW NYLON CLR 0 0.14400 $1.44
5 9 CKN9018-ND SWITCH TACT 4.5MM 130GF H=3.8MM 0 0.31000 $2.79
6 5 10H-ND RES 10 OHM 1/2W 5% CARBON FILM 0 0.04600 $0.23
7 5 22H-ND RES 22 OHM 1/2W 5% CARBON FILM 0 0.04600 $0.23
8 2 67-1606-ND LED 3MM ULTRA WHITE WATER CLEAR 0 3.75000 $7.50
9 1 KE1117-ND SOLDER RA FLUX 21AWG 60/40 .5LB 0 8.88000 $8.88

Subtotal $25.27

Monday, September 12, 2005

The Money Starts Flowing

OK, that was my little intro.

Now it's time to start documenting how much money I am pouring into this latest whim...

I started tonight, when I bought some stuff on ebay.

First, I bought a set of two non-working 4-switch Atari 2600's (one wood finish, one all black), with 4 joysticks, paddles, and two power supplies and RF converters.


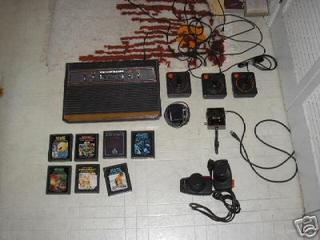
I am hoping that depending on what exactly is broken, that when I hack off most of the internal parts to make my portable, that the broken stuff will get hacked off as well! If not, hopefully I can troubleshoot at least one system. I also figure I can have some spare parts in case I mess something up, and I can always fix one up (maybe?) and sell it to cover some costs of this money pit. Total cost of the consoles was $15.59 (good deal I think), but with shipping it came to $30.59.

Next, I saw the same guy was selling a load of 39 cartridges:

I bought those as well, total cost was $37.02 plus another $10 shipping came to $47.02. About $1.20 per game, not bad since there were no duplicates and most of them were good games that I was interested in (still need Pitfall though).

Finally, I bought a working console (heck, I had to at least have something I knew worked so I could test the non-working pieces from the other systems) for only $6.50 (now THAT was a steal) with almost $10 shipping, total was $15.85. Came with 7 games, more joysticks, etc.


So at this point, total money blown is $93.46.

Sunday, September 11, 2005

Documenting the Adventure

Well, I guess this is my first ever blog posting. I decided to start my own blog to document my adventures associated with building a portable Atari 2600. As if I didn't have enough hobbies... I never even had a 2600! I had an Atari 800 computer around the same time the 2600 was out, but always enjoyed playing the 2600 at other people's houses.

Anyway, I have never done any electronics work in my life, but I saw a book about hacking old video game consoles
http://www.amazon.com/exec/obidos/tg/detail/-/0764578065/
and decided it looked cool and I needed to do my own... so this blog will document my success or failure as it happens! After I get it going, maybe I will actually tell people about the site... :)